React is one of the most popular technologies for front-end development, which uses a component based approach to enable fast app development. Redux is a predictable state container for JS apps, and works particularly well with React. In this article, I will be covering some basics on how to set up React-Redux for state management of a UI.
To illustrate the advantages of this approach, have a look at the UI structure shown below.

Let’s say the functionality required is that when a user interacts with the big component, the application has to update the small component and the header. In other words, we need to sync the header and small component as well as manage the states of all the other components. Without a state management library such as the one provided by Redux, coding this implementation can easily become very complicated.
Using the state functionality in React allows only the use of local, component level states.
You can store the states using setState method, and fetch the stored state using state.[STATE_NAME]. However, these states are local, and only available within the class component in which it is declared.

To store the states at the application level, i.e. the global level, in order to access them from different components, we can use React-Redux.
Let’s see how React-Redux works
You will see three main elements in the Redux architecture – Store, Dispatch Actions and Reducers.
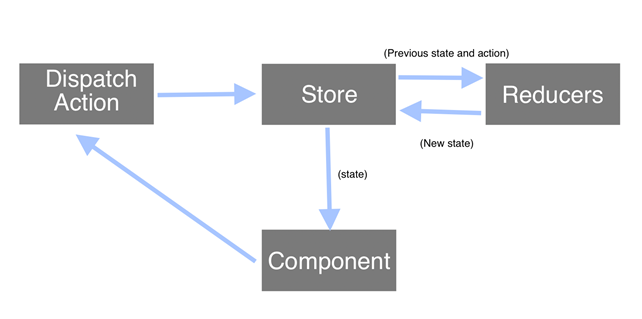
Store: holds the states at the application level, and allows any component to get data from the store in the form of Redux States.
Dispatch Action: a function of the Redux Store to trigger a state change.
Reducers: It handles the value change in Redux State.
How to configure React Redux in a React JS project –
The following packages are needed to be installed to configure Redux in the project –
- Redux: the core package of React Redux.
- React-redux: needed for React bindings.
- Redux-thunk: a middleware which allows you to call action creators, and which returns a function instead of the action object.
These dependencies can be installed by using the following NPM command –
“npm install redux react-redux redux-thunk –save”
After these dependencies are installed, a store can be created and initialized with data/null values as per the requirements. This can be done by creating the file store.js in the project.
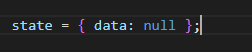
First however, you need to create reducer.js to handle the next states. Below is the example of reducer.js to initialize the state. Here, it is just returning the initial value from the reducer.

Below is a slightly more complex example of the code in reducer.js to update the states based on the action executed from the component.

In the above example, it adds the data to the state upon the dispatch action (ADD_DATA). Now let’s create the action to dispatch. You can create a file with the name action.js, that contains the code shown below.

Once the action is created, now you can create a store and then connect the store to the application. You can create a file with the name store.js, that contains the code shown below.

To connect the store to the application, you will have to use the entry point. In the index.js (i.e. entry point of the app), import the store as shown below –
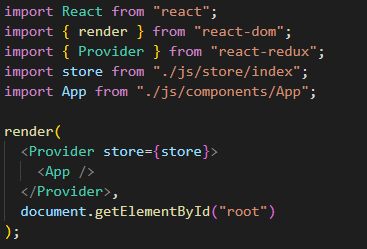
These are all the Redux configurations for an application. Refer the the image below to use it in your component –

React Redux can handle large amounts of data at the application level with cleaner components and is particularly useful for big applications.


Without redux, to transfer data from component 1 to component 5, you need to pass it through middle components. This increases the props for components and creates more complexity and the components are less clean.
Using React-Redux, you can get or set the data to the store from any of the components directly by mapping the redux states to component props. In this case, you do not need to pass props to the middle components. This allows for much cleaner components and increased clarity in the code.
If you are looking to build a mobile or web application using React technology, then please feel free to contact us.