Introduction
The Database plays a vital role in any web or windows application development. The Database project can be used to maintain the repository of the schema changes.
Why do we need a Database project?
While developing any application, the developer has to work on many database tasks such as creating tables, triggers, stored procedures, functions, etc. It is difficult to manage the scripts at the time of deployment. Also, it is tedious to review the changes made by the developer during development. The database project in Visual studio addresses these issues.
How to create a database project?
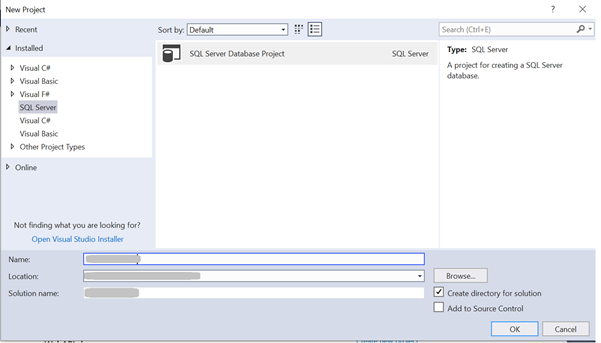
- Create a new project in visual studio. Select the SQL Server Database Project, as shown below.
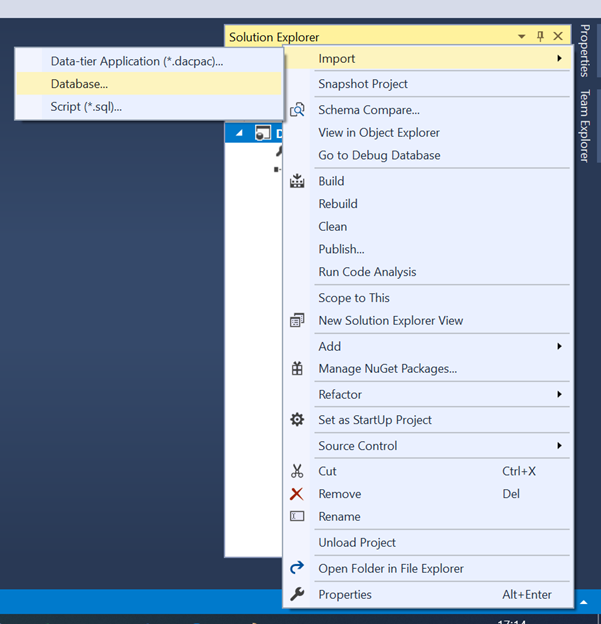
2. Right-click on the project and select Import????Database
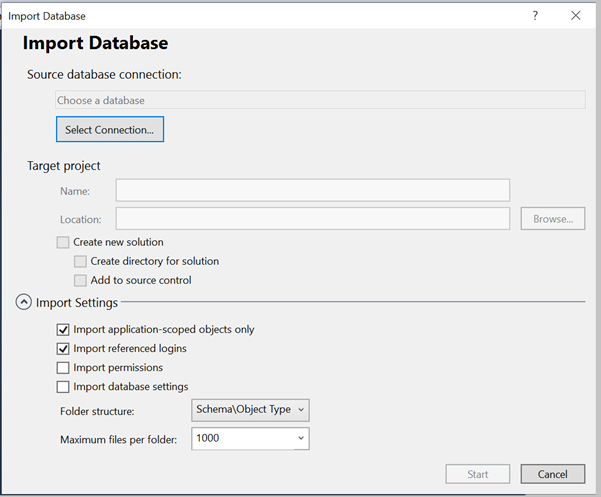
3. After this, you get one popup as follows. Click on ‘Select Connection…’ option to import the database.
4. You will receive another popup to select the connection properties of your database. After entering the credentials (and authenticating successfully), you will get the dropdown filled with a list of databases on the SQL server. Select the database for which you are creating the project.
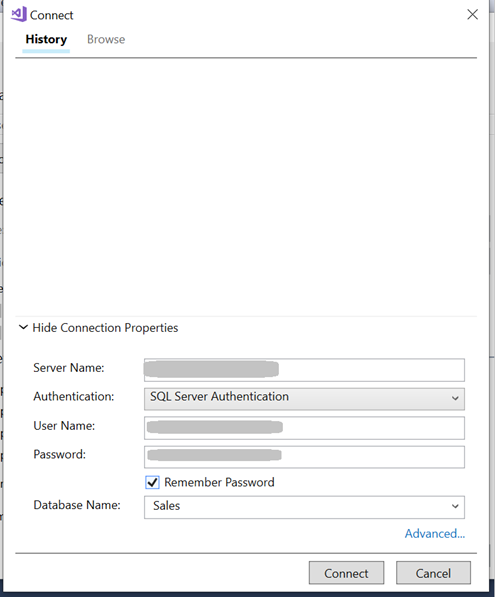
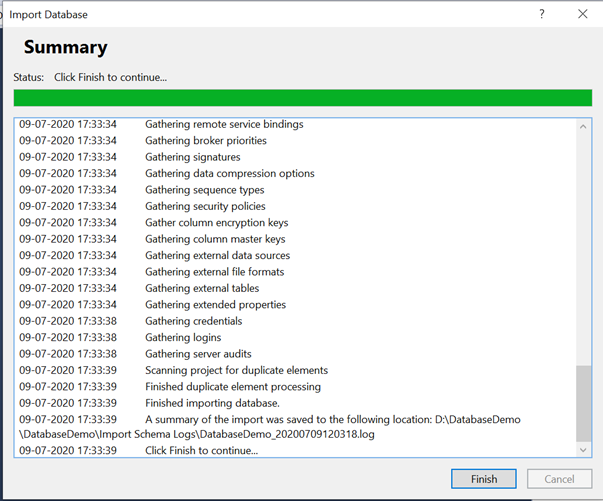
5. Once you click on ‘Connect’, you will notice all the tables, procedures, functions, etc. which will get imported.
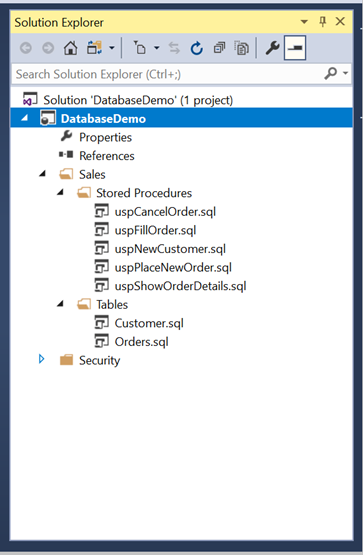
6. Check solution explorer for your database related artefacts.
7. Now compare your project schema with the database schema after performing modifications to the database. Right-click on the solution and select Schema compare, as shown below.
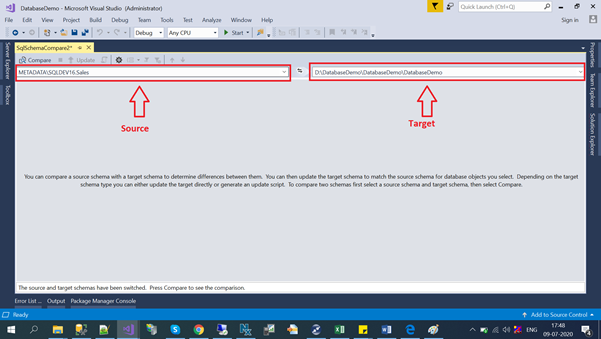
As you can see in the above image, there are two sections Source and Target.
Source: If you have made any changes in the database and you want to compare those on the target, then select the database name. If however, you have made changes in the database project that you want to compare with the database, then select your project path.
Target: It will always be with the source which will be compared. If you want, you can swap Source and Target. Once selected, click on ‘Compare’ to compare Source and Target schemas.
8. For example, I have added the Enquiry table in the database; Clicking on Compare allows you to see a list of modifications.
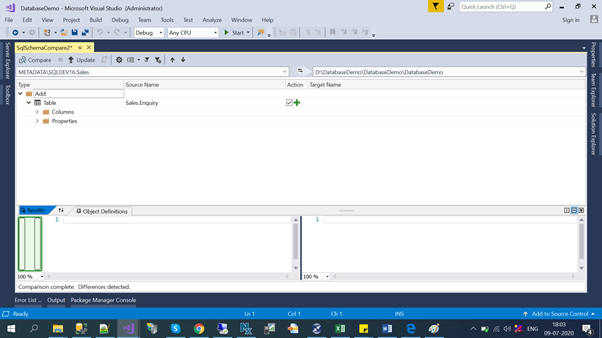
The Action column in the above image is displayed if the changes are new or if there are any updates or deletions in the schema.
When you check the box and click on ‘Update’, all the changes will be applied to Target.
9. Now if you have made any changes in the database project and you want to execute those on the Production UAT database, then execute it in the same way as shown above.
10. In order to create the scripts for the changes, then compare the Database project with the Target Database. Then click on ‘Generate Scripts’.
Merits and Demerits of Database Project:
Merits:
- DDL (Data Definition Language) is readily available for all the objects.
- Deployment scripts can be easily generated.
- A database project also includes designers for working with these files.
- Version control can be done for the database through a series of check-in and check-outs for various operations performed on scripts and schema changes.
- Reviewing database changes is easier and allows Dot Net developers to be more effective in terms of making changes and reviewing previous modifications done by team members.
Demerits:
- Schema designing is not available.
- References to external database sources cannot be created in the database project.
- The Visual studio database project only supports the SQL Server.